Sign Your Git Commits Using the Tillitis TKey security token

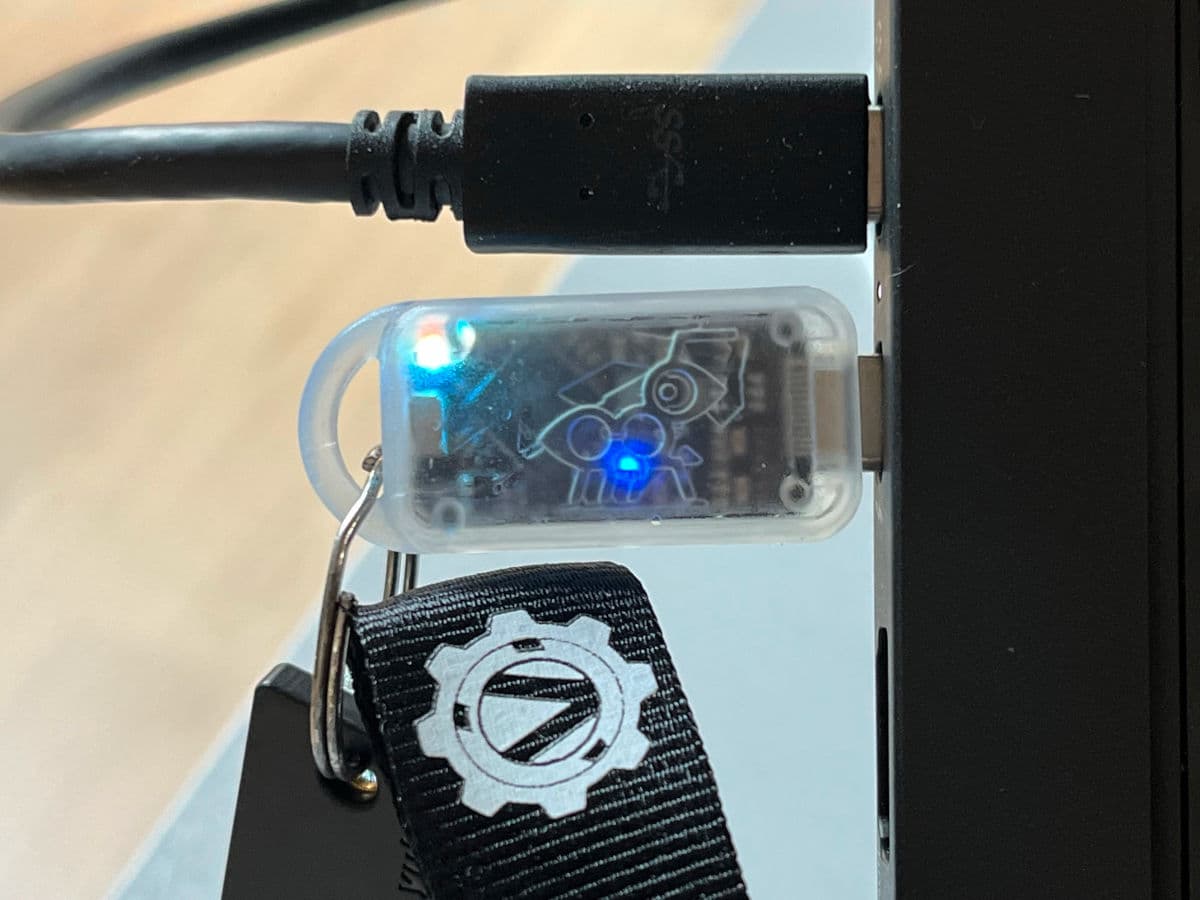
In a previous blog post, we gave a practical example of how to use the TKey for authentication and showed how to develop simple apps for it on Linux. In this article we will demonstrate another use case, namely digital signatures. As you may know, digital signatures is an important technique to manage integrity of information and to verify the origin of data. We will describe how to set up and utilize the TKey for digital signatures, and we will also give a practical example of how to use the TKey to sign git commits. This time we will focus on Windows.
Digital signatures
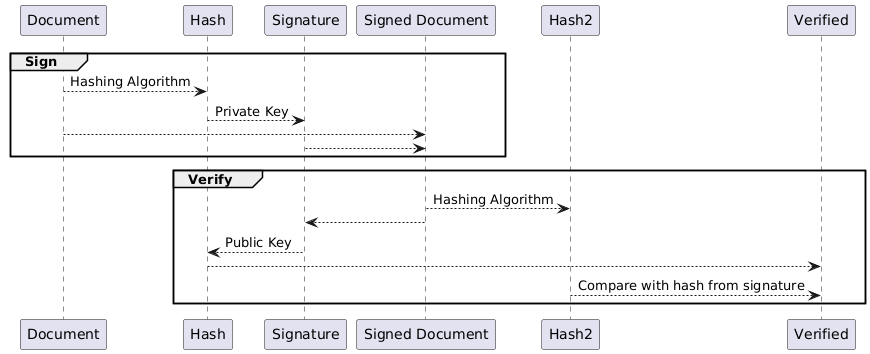
Digital signatures, works by a different process than encryption, in this case a hash of the data is calulated and then encrypted with the private key, the result is the signature. The signature can then be verified by a receiver calculating a hash of the data and decrypting the signature with the public key, as the public key can be shared, and comparing the hashes to verify if the data is correct. The entire flow can be seen in the picture below. The TKey uses Ed25519 curve cryptographiclly and SHA-512 as hash algorithm.

Using TKey for signing
TKey has an app for making signing requests of data. This app can be installed in Windows, Linux and MacOSX.
In this article we will use Windows, but the steps are similar on Linux and MacOS. Installation instructions for those platforms can be found here https://tillitis.se/app/tkey-signature-tool/
In Windows:
- Open powershell
- Run
winget install tillitis.tkeysign
We have now installed the tkey-sign tool, which creates signatures of data with the help of the TKey.
If we follow the flow in the diagram earlier we can plug in our TKey and in powershell run:
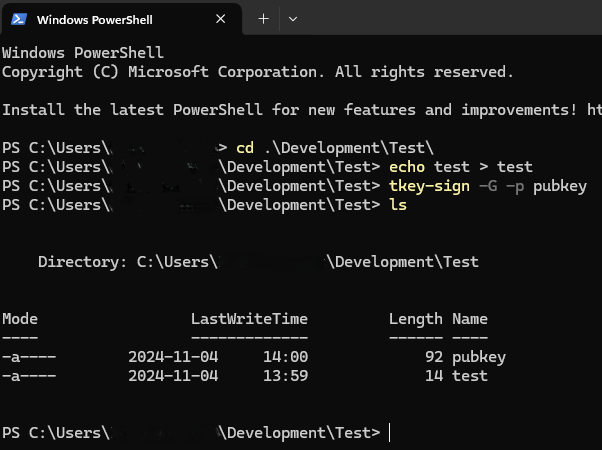
echo test > test, to create a file "test" with some test datatkey-sign -G -p pubkey, to create the public key "pubkey", use--ussto create a separate private/public keypair to sign with.

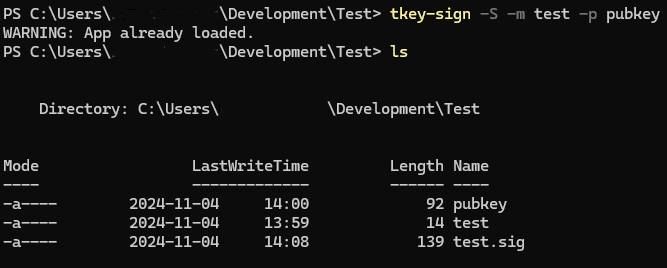
Now run the command tkey-sign -S -m test -p pubkey and touch the TKey when flashing green which will create a signature with the same name as the message. You will see the file test.sig, this file will contain a Base64 encoded string that is the encrypted SHA-512 hash of the file test. The private key was used for encryption, this was done by the security token as the private key can never leave the it.

Unplug the TKey and run the command tkey-sign -V -m test -p pubkey to verify the signature against the message with the help of the public key, you should get the message Signature verified back. What happens behind the scenes is that a SHA-512 hash is calculated of the file test. The encrypted data in test.sig is decrypted with pubkey and the two hashes are compared, if they match the data is correct, if not something has happened with the data.

Run the command echo test1 > test and run the verification command above again to confirm that the signature no longer matches.

Using TKey for signing Git commits
The TKey can be used to sign commits in git, instead of using gpg which is the default. It will use the ssh keys to sign commits and make use of the tkey-ssh-agent. Signed git commits provide an extra grade of security by ensuring control over who has done changes in a project and if the changes have been verified.
Preparations
- First follow the guide about installing the tkey-ssh-agent and configure it with persistent SSH_AUTH_SOCK (Method 1) for the OS you will use. (Link to guide)
Configuration of Git
- Get SSH public key from TKey, by running
ssh-add -L - Configure a name:
git config –global user.name <Your name> - Configure an email:
git config –global user.email <Your email> - Configure a signing key:
git config –global user.signingKey <Public key generated from TKey> - Configure to sign every commit, which is optional, if set to
trueit omits the use of-Severy commit:git config –global commit.gpgsign true - Configure to use ssh keys for signing:
git config –global gpg.format ssh - Configure to use Windows OpenSSH ssh-keygen:
git config –global gpg.ssh.program C:/Windows/System32/OpenSSH/ssh-keygen.exe - Configure to use Windows OpenSSH ssh:
git config –global core.sshCommand C:/Windows/System32/OpenSSH/ssh.exe - Configure allowed_signers file for local verification:
git config –global gpg.ssh.allowedSignersFile = C:/Users/<user>/.ssh/allowed_signers
Copy-friendly list of the commands above:
ssh-add -L
git config –global user.name <Your name>
git config –global user.email <Your email>
git config –global user.signingKey <Public key generated from TKey>
git config –global commit.gpgsign true
git config –global gpg.format ssh
git config –global gpg.ssh.program C:/Windows/System32/OpenSSH/ssh-keygen.exe
git config –global core.sshCommand C:/Windows/System32/OpenSSH/ssh.exe
git config –global gpg.ssh.allowedSignersFile = C:/Users/<user>/.ssh/allowed_signers
Configuration of Allowed signers
SSH-keygen uses a special file to verify signatures called allowed_signers. This file is similar to the authorized_users file for public key access but has a slighlty different format. More advanced information surrounding the format can be found here.
- Create the file
C:\Users\<user>\.ssh\allowed_signersif it doesn't exist. - Add a new line in the format of
<git email> <git signing key>, such asjoe@example.net ssh-ed25519 AAAAAAAAAAAAAAAAAAAAAAAAAA..., and save the file.
Usage
To sign commits in git, either use the -S option if commit.gpgsign is false, else it is done automaticly. Additionally, the TKey will need to be inserted in the computer and flash green whenever a commit is done. To inspect commit signatures, and to verify if the signature is good, use the command git log --show-signature, as seen in the picture below.

Conclusion
We've shown how to set up and utilize the Tillitis TKey security token for digital signatures (on Windows) and provided a practical example of how to use the TKey to sign git commits. If you have ideas for further posts about the Tillitis TKey or just have questions, please contact us!